
这篇教程是向易采站长站的朋友介绍用AI制作逼真的扬声器方法,教程制作出来的扬声器很漂亮,难度也不是很大,很值得大家学习,推荐过来,大家快快来学习吧!
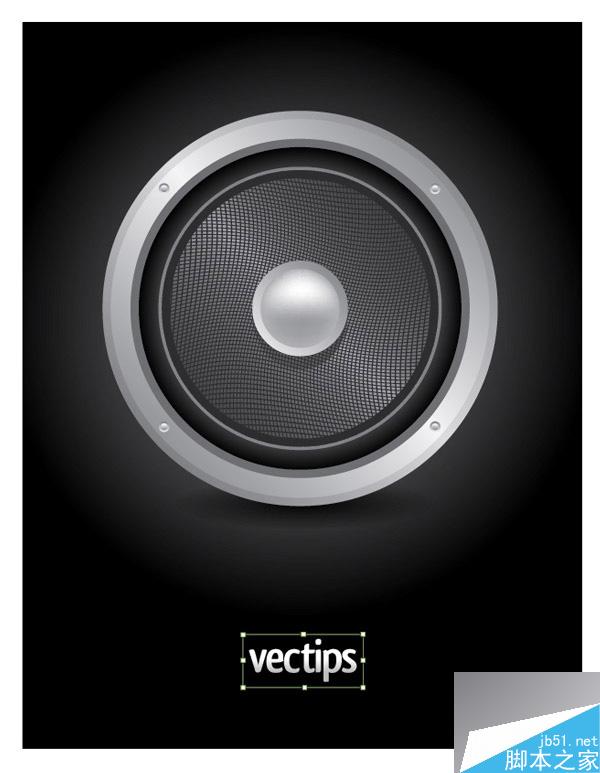
Final Image PreviewLet's take a look at the final icon design below.
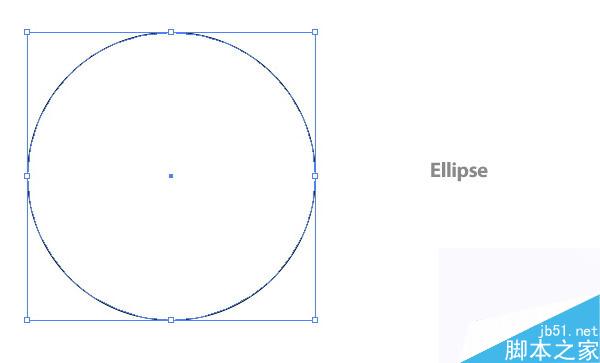
Create a new document that is 8.5 inches wide by 11 inches tall. Then use the Ellipse Tool (L) and create a 6 inch by 6 inch ellipse.
Step 2
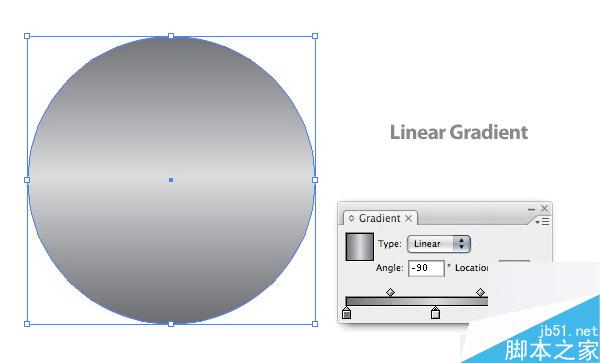
With the ellipse selected, create a Linear Gradient from the Gradient Panel. Add another swatch to the Gradient Slider by clicking just below the slider. Change the first swatch to a 57% black, the second swatch to a 12% black, and the third swatch to a 57% black.
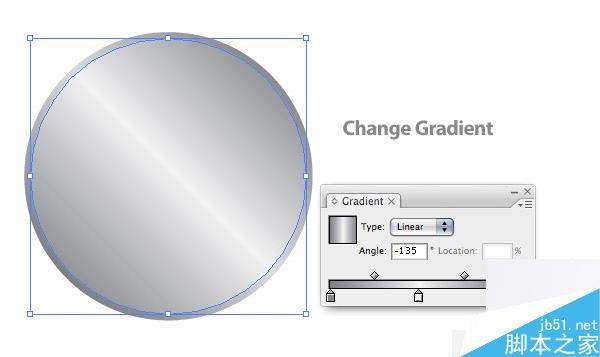
Step 3
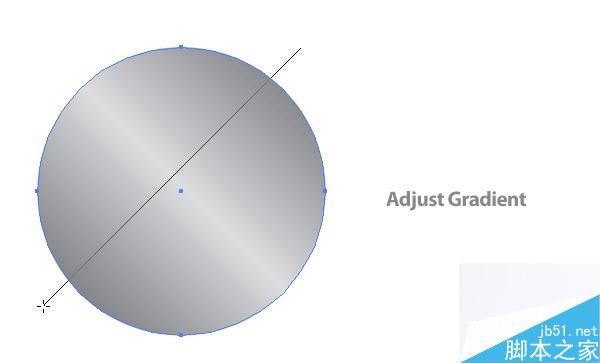
With the Gradient Tool (G), adjust the gradient by clicking and holding Shift, and drag from the top-right of the circle to the bottom-left. Now, the gradient should look like it is at a 45 degree angle.
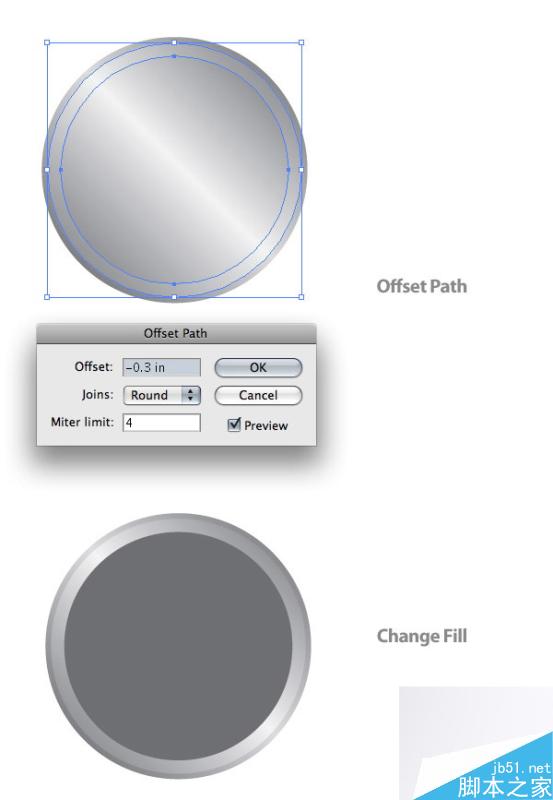
Step 4
With the ellipse selected, go to Object > Path > Offset Path to bring up the offset dialog. Change the Offset to -.125 inches.

Step 5
Change the first swatch on the offset ellipse to a 50% black, the second swatch to a 4% black, and the last swatch to a 50% black.
Step 6
With the smallest ellipse selected, Offset the path again. This time set the Offset to -.3 inches and change the fill to a 60% black.
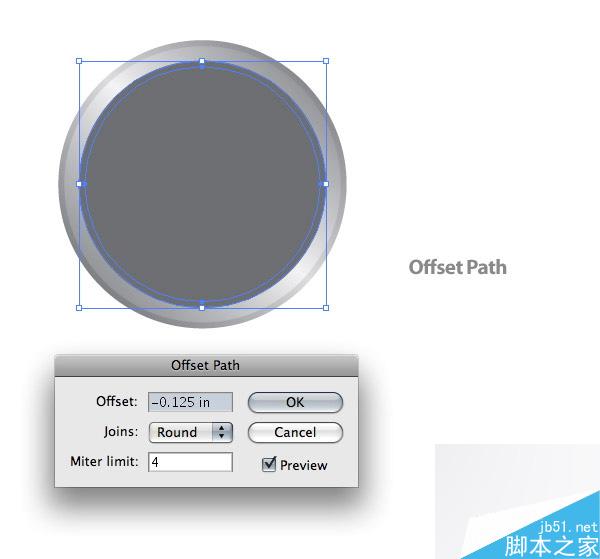
Step 7
With the smallest ellipse selected, Offset the path yet again. This time change the Offset to -.125 inches.
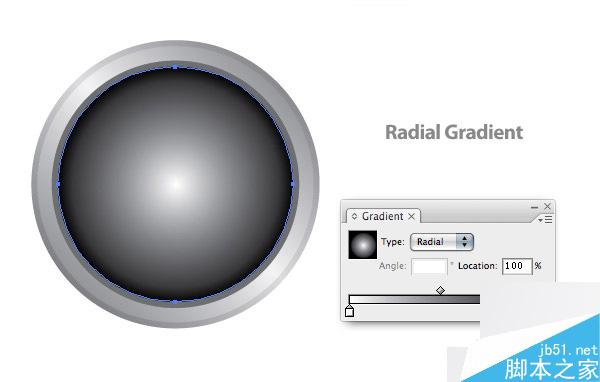
Step 8
With the new ellipse, create a Radial Gradient from the Gradient Panel and change the first swatch to white and the second swatch to a 100% black.
With the radial gradient ellipse selected, Offset the path at -.3 inches and change the fill color to a 50% black.


